
You step onto the job site and immediately trip over a stack of old drywall. By noon, the pile of debris has blocked the main walkway, slowing your crew to a crawl and creating a genuine safety hazard. Most project delays don't happen because of backordered materials. They happen because the site is too cluttered to function. Developing a professional renovation waste disposal plan is the only way to prevent this chaos from sinking your schedule and your budget.
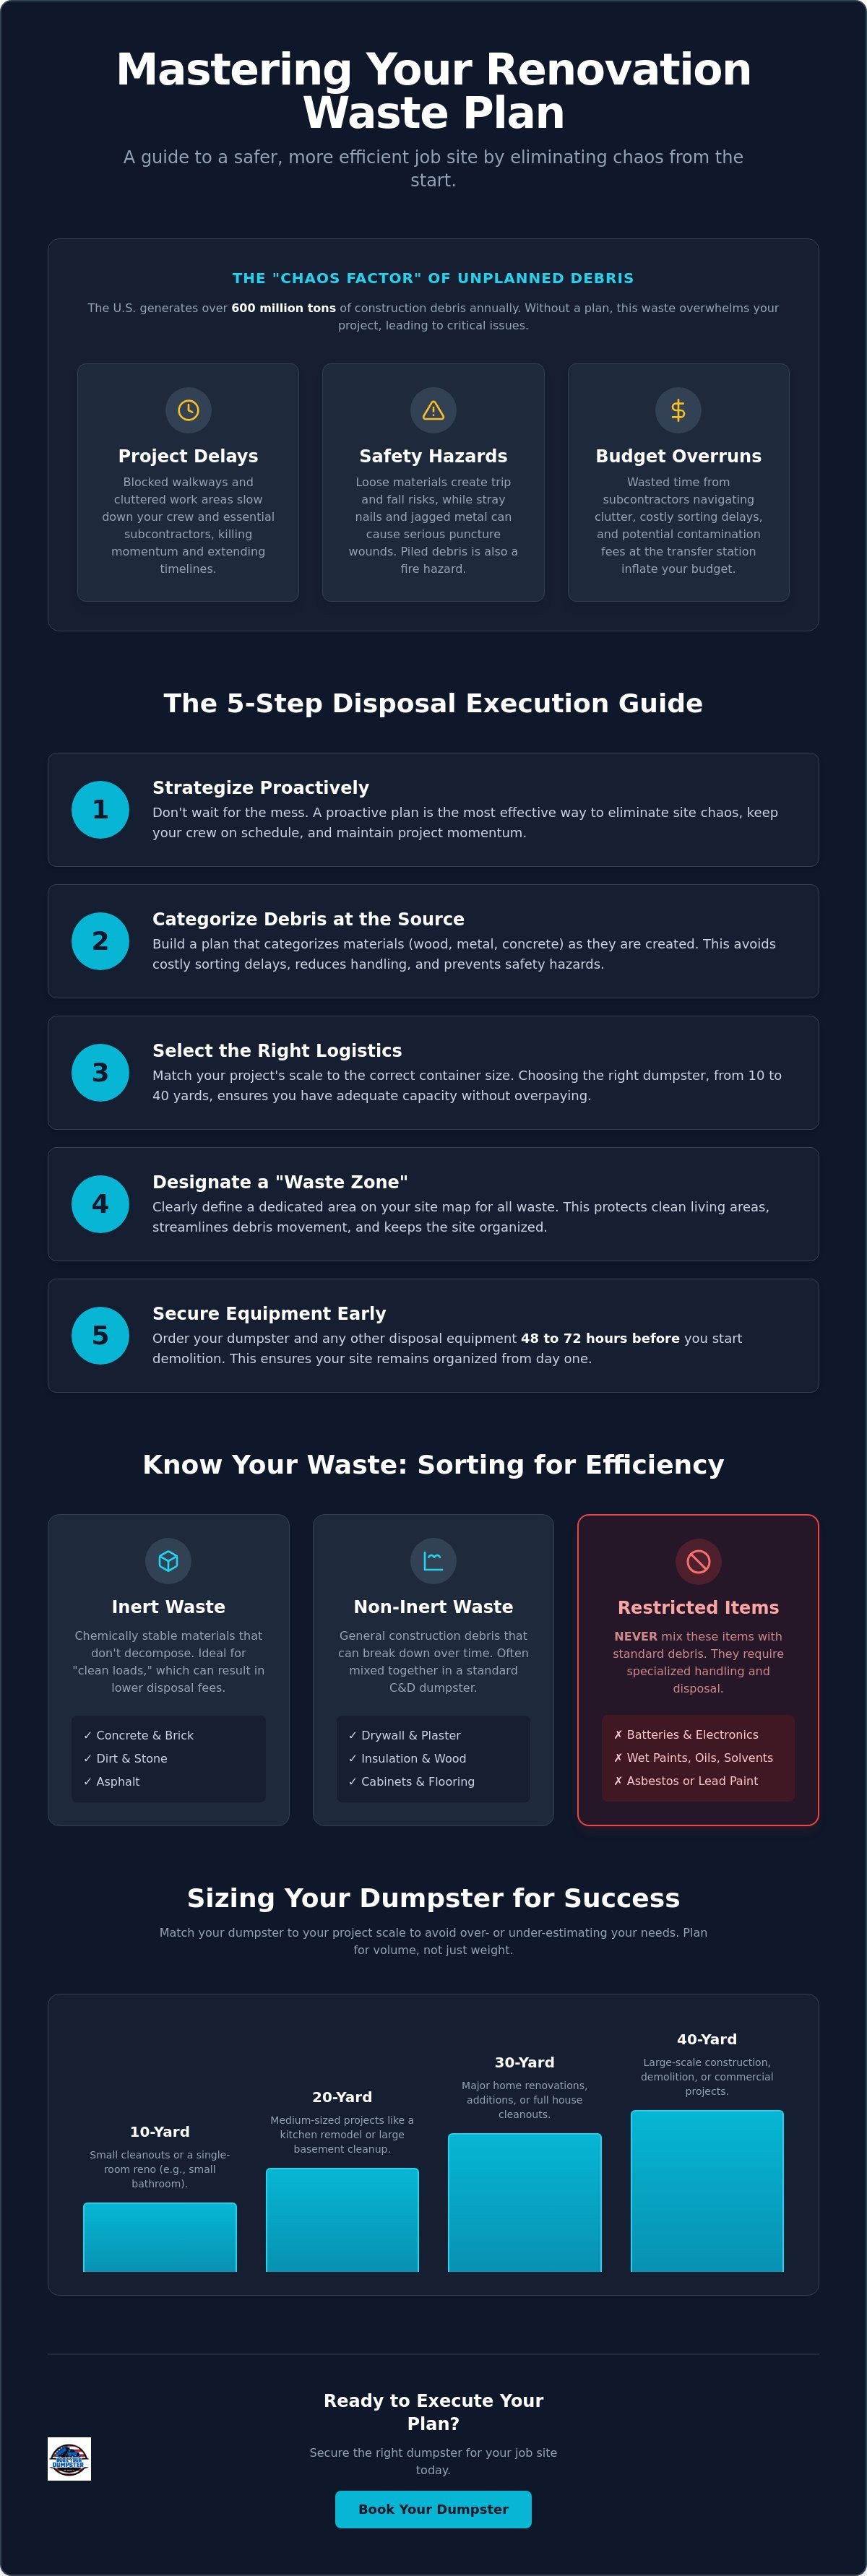
We know that managing debris feels like a chore compared to the actual construction work. However, with the U.S. generating over 600 million tons of construction debris annually, the mess can quickly overwhelm your property. This guide shows you how to master waste logistics to ensure a clean, safe workspace. We'll cover how to sort materials at the source, navigate local regulations, and establish a clear timeline for removal. Follow these steps to reclaim control of your project and keep your disposal costs predictable from start to finish.
Key Takeaways
- Understand why a proactive disposal strategy is the most effective way to eliminate site chaos and keep your crew on schedule.
- Build a renovation waste disposal plan that categorizes materials at the source to avoid costly sorting delays and safety hazards.
- Select the right logistics by matching your project scale to specific container sizes, ranging from 10 to 40-yard dumpsters.
- Designate a clear "Waste Zone" on your site map to protect clean living areas and streamline the movement of debris.
- Secure your equipment 48 to 72 hours before you start demolition to ensure your site remains organized from day one.
Why a Waste Disposal Plan is Your Best Defense Against Renovation Chaos
A renovation waste disposal plan is more than a simple cleanup checklist. It's a proactive logistical strategy designed to track, sort, and remove debris before it interferes with your workflow. Without a plan, your job site quickly becomes a graveyard for demolition waste. Every scrap of wood or pile of drywall acts as a physical barrier to progress. When you don't have a system, you don't have control.
Efficiency depends on clarity. When a site is clean, your crew moves faster. When it’s cluttered, you face the "Chaos Factor." Unmanaged piles of debris lead to decision fatigue. You spend more time thinking about where to put the next load of trash than you do on the actual renovation. A solid plan removes this mental and physical friction. It allows you to maintain momentum and keep your mind on the finish line.
The Hidden Link Between Clutter and Project Delays
Clutter is a project killer. When debris piles up, it blocks access for essential subcontractors like plumbers and electricians. These professionals often bill by the hour. If they spend the first forty minutes clearing a path to the pipes, you’re losing money. You also fall into the trap of the "shuffling problem." This happens when you move a pile of trash from one corner to another just to get it out of the way, only to move it again later. You should only touch waste once. A clear workspace also ensures that building inspectors can evaluate your work without obstruction; this speeds up the sign-off process and keeps you on schedule.
Safety First: Reducing On-Site Hazards
Safety is not optional. A disorganized site is a breeding ground for injuries. Piles of loose materials lead to trips, falls, and deep puncture wounds from stray nails or jagged metal. Beyond physical obstacles, unmanaged waste presents a serious fire risk. Accumulated sawdust and flammable scraps can ignite quickly in a busy work environment. If you’re renovating a home while living in it, containment is even more critical. A dedicated containment strategy prevents children and pets from wandering into dangerous debris zones. Use your renovation waste disposal plan to define exactly where trash goes the moment it’s created. This keeps the site professional and ensures every person on the property remains protected from avoidable accidents.
Categorizing Your Debris: The Foundation of an Effective Plan
A successful renovation waste disposal plan begins with knowing exactly what you’re throwing away. Don't treat your debris as a single, massive pile of junk. Instead, break it down into manageable categories like wood, metal, drywall, and masonry. Sorting your materials as you go is significantly more efficient than the "dump and sort later" method. It saves you from handling the same heavy debris twice and keeps your workspace organized for the next phase of construction.
Logistics change depending on the scope of your work. Structural demolition often generates heavy masonry and large timber, while cosmetic updates focus on cabinets, flooring, and fixtures. For larger projects, consider the difference between a "mixed debris" load and a "clean load." A clean load consists of only one type of material, such as pure concrete or wood. Many facilities offer lower rates for these single-stream loads because they are easier to process. If you have a large volume of one material, separating it can lead to noticeable cost savings.
Sorting at the Source: Inert vs. Non-Inert Waste
Waste management professionals distinguish between inert and non-inert materials. Inert waste includes concrete, brick, dirt, and stone. These materials are chemically stable and don't decompose. Non-inert waste, such as drywall, insulation, and treated wood, requires different handling because it can break down or leach chemicals over time. You should prioritize reusing and recycling construction materials whenever possible to reduce landfill impact. Proper sorting at the source prevents contamination fees at the transfer station. If you throw drywall into a dedicated concrete bin, the entire load may be reclassified at a much higher price point.
Handling Hazardous Materials and Restricted Items
Not everything belongs in a standard roll-off container. You must identify and isolate restricted items immediately. This list includes batteries, wet paints, oils, solvents, and electronics. If you’re working on a home built before 1978, be alert for asbestos or lead-based paint. These materials require specialized abatement and cannot be mixed with standard construction waste. Set these items aside in a designated, secure area for specialized pickup. If you aren't sure which bin fits your project, check available dumpster sizes to find the right match for your debris types. Taking five minutes to categorize your waste now prevents hours of logistical headaches later.
Selecting the Right Logistics: Sizing Your Dumpster for Success
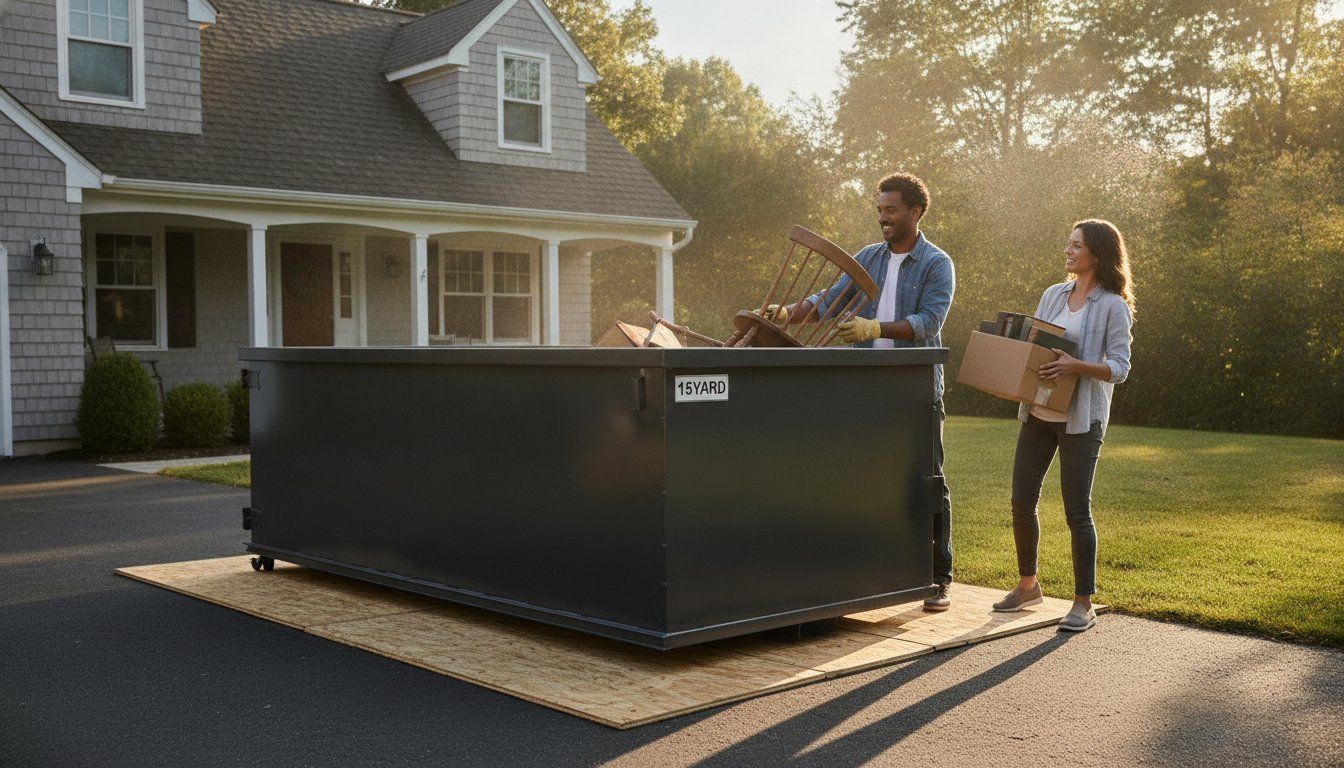
Choosing the correct container size is the most critical logistical step in your renovation waste disposal plan. If you underestimate your debris volume, you'll face the high cost of a second delivery and pickup fee. If you overestimate, you're paying for empty air. Most projects fall into four primary categories: 10, 20, 30, and 40-yard containers. The 10-yard dumpster is often the secret weapon for residential refreshes. It fits easily into tight driveways and holds enough for a standard bathroom or small kitchen gut.
Weight limits are just as important as volume. Heavy materials like roofing shingles, concrete, or dirt can quickly exceed the weight capacity of a larger bin. For example, a 10-yard container filled with shingles often reaches its limit before it’s physically full. Always disclose your specific materials to ensure your logistics match the physical reality of the load. Integrating sustainable materials management principles means choosing a size that allows for efficient transport without overloading the vehicle.
Estimating Volume Without Overpaying
Visualizing cubic yardage is difficult for most homeowners. Use this rule of thumb: one cubic yard is roughly the size of a standard kitchen stove. A 10-yard dumpster holds about ten stoves worth of debris. For a single-room gutting project, a 20 or 30-yard container is typically required. Hiring a 10 yard dumpster rental is often the most cost-effective entry point for DIY projects because it forces you to be disciplined with your waste sorting. It provides enough space for most debris without taking up the entire driveway.
Strategic Placement in Tight Urban Environments
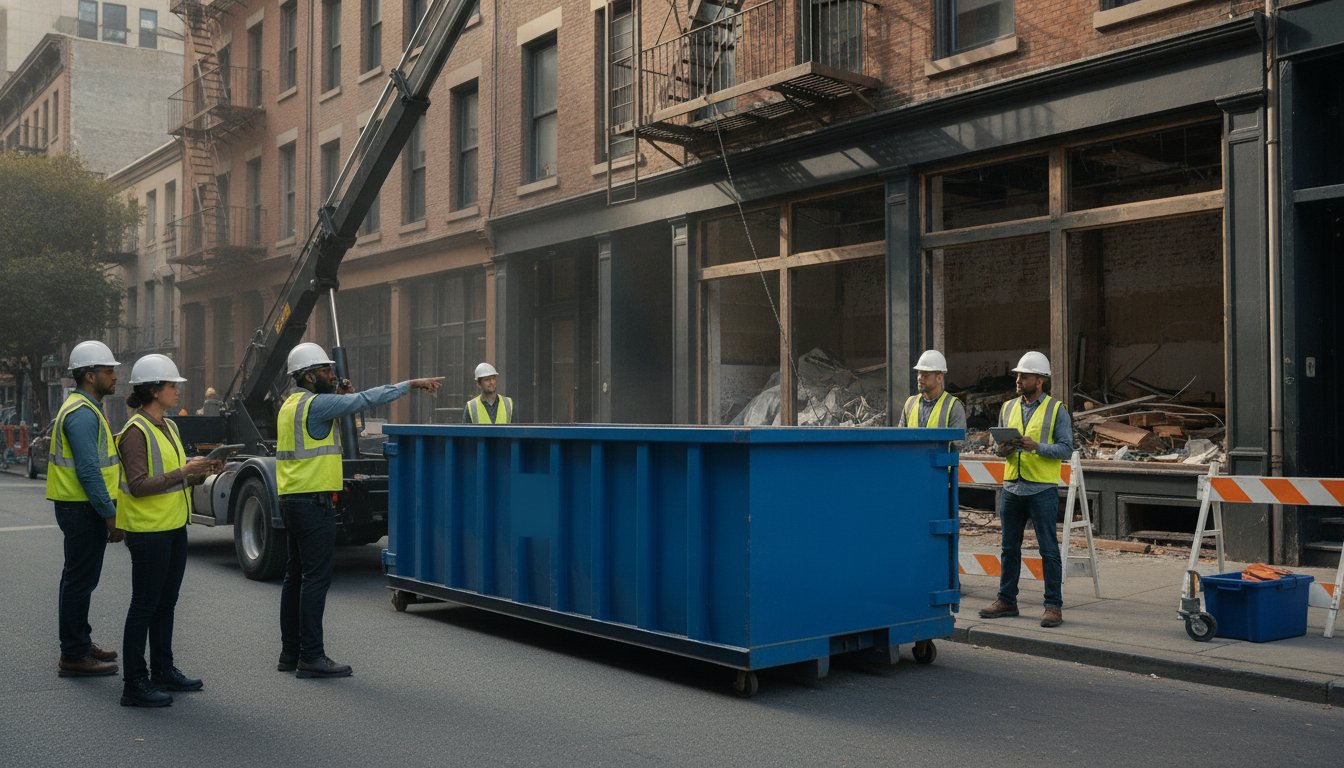
Placing a dumpster in high-density areas like Queens, San Francisco, or Boston requires extra planning. Many urban lots don't have driveways large enough for a roll-off. In these cases, you must secure a permit to place the container on a public street or sidewalk. Check your local municipal requirements at least 72 hours before delivery. To protect your property, always place plywood boards on your driveway before the truck arrives. This simple step distributes the weight and prevents the metal rollers from cracking your asphalt or concrete. Proper placement ensures your crew has a short, clear path to the bin, which maintains site speed and keeps the project moving forward.
The 5-Step Execution Guide for a Stress-Free Disposal Process
Once you have categorized your materials and selected the right size, you must move into the execution phase of your renovation waste disposal plan. Logistics fail when they aren't followed by every person on the job site. Execution is about discipline and timing. Use these five steps to keep your site organized and your project moving forward without delay.
- Step 1: Map your "Waste Zone." Clearly define where debris will be staged. Ensure this path doesn't cut through clean living areas to prevent cross-contamination.
- Step 2: Secure your equipment early. Contact your provider 48 to 72 hours before demolition begins. This lead time ensures your container is on-site before the first swing of a hammer.
- Step 3: Train your crew. Spend ten minutes explaining the sorting rules to your family or crew. One person throwing a gallon of wet paint into a dry bin can trigger significant contamination fees.
- Step 4: Monitor volume daily. Check the fill level every evening. Never allow debris to rise past the "water line," which is the top edge of the container. Overfilled bins are a safety hazard and cannot be legally transported.
- Step 5: Schedule the final haul-off. Call for a pickup the moment the demolition phase concludes. Leaving a full bin on your property longer than necessary invites illegal dumping from neighbors and takes up valuable space.
Establishing Traffic Flow and Waste Zones
Site protection is the first step in establishing a waste zone. Use heavy-duty floor protection and plastic sheeting to create a dedicated "debris path" from the work area to the exit. Place your container as close to the primary exit point as possible. This minimizes the distance you have to carry heavy loads, which saves labor hours and reduces physical fatigue. For larger rooms, use smaller bins or "toter" carts to consolidate waste inside before wheeling it out to the main container. This keeps the interior workspace clear and allows your crew to focus on the task at hand rather than dodging piles of trash.
Scheduling Pickups and Managing Lead Times
Punctuality is vital, especially in high-traffic urban areas like New York or Illinois where street space is limited. You must decide between "on-call" pickups and scheduled rotations. On-call works best for smaller residential projects where the pace of demolition varies. For larger gut renovations, a scheduled rotation ensures a fresh bin arrives exactly when the old one is full. Understanding the nuances of roll off dumpster rental allows you to integrate waste management directly into your master timeline. Don't wait until the bin is overflowing to make the call. If you want to maintain a clean and productive job site, schedule your next delivery online to ensure your logistics stay ahead of your debris production.
Executing Your Plan with Book Your Dumpster USA
A renovation waste disposal plan is only as good as the logistics provider that supports it. You have mapped your waste zones and categorized your materials; now you need the physical hardware to move that debris off your property. Book Your Dumpster USA acts as your pragmatic partner in this process. We specialize in removing the logistical friction that often stalls local renovations. By providing a reliable foundation for your waste management, we allow you to focus on the craftsmanship of your build rather than the mess in the driveway.
We offer a full fleet of roll-off containers to fit any project scale defined in your plan. You can choose from our 10, 20, 30, and 40-yard dumpsters depending on your specific volume estimates. We maintain a strict commitment to pricing integrity and punctuality across all our service areas, including New York, New Jersey, Illinois, and Massachusetts. When you schedule a delivery, you receive a transparent agreement without hidden fees or vague arrival windows. We treat your project timeline with the same urgency you do.
Streamlined Online Booking for Busy Renovators
Modern renovations move fast. You don't have time to wait on hold or trade voicemails with a dispatcher. Our 24/7 online portal allows you to secure your equipment in minutes from any device. This digital-first approach provides immediate clarity on availability and cost, which is essential for staying within your renovation budget. You simply select your size, choose your dates, and finalize the order. We also provide the local expertise necessary to navigate city-specific regulations. Whether you need to know about permit requirements or street placement rules, our team ensures your container arrives without legal complications.
Reliable Support Across Major Metro Areas
We maintain a high-functioning presence in major hubs, including New York, New Jersey, Illinois, Massachusetts, and San Francisco. Our professional, no-nonsense approach to delivery and placement ensures that your container sits exactly where it needs to be. We understand the constraints of urban job sites and the need for precision. Our drivers are trained to place containers safely, protecting your property while maximizing accessibility for your crew. For those managing complex projects who need more advanced insights, refer to The Ultimate Guide to Construction Debris Removal. When you are ready to reclaim control of your job site, book your dumpster online and experience a waste management service built for the modern contractor.
Reclaim Your Job Site Today
A clean renovation isn't a luxury. It's a requirement for staying on schedule. By categorizing your debris and mapping your waste zones, you eliminate the physical barriers that slow down your crew. A solid renovation waste disposal plan ensures you spend your time building, not shuffling trash from one room to another. Logistics shouldn't be the hardest part of your project. You need a partner who values punctuality and pricing integrity as much as you do.
Book Your Dumpster USA provides the tools you need to maintain total control. We offer a streamlined online booking system and a full range of 10, 20, 30, and 40-yard containers to fit any project scale. Whether you are working in New York, New Jersey, Illinois, Massachusetts, or San Francisco, we deliver the reliability your project demands. Book Your Dumpster Now to secure your site logistics and keep your timeline on track. Don't let the mess dictate your progress. Start your demolition with confidence and keep your workspace professional until the final inspection.
Frequently Asked Questions
What should be included in a construction waste management plan?
A construction waste management plan must identify material types, estimated volumes, and a removal schedule. It also designates specific "Waste Zones" on your site map to prevent site chaos. Including these details in your renovation waste disposal plan ensures you stay compliant with local regulations and keep your project on schedule. This document acts as your logistical roadmap, helping you track every ton of debris from the moment it’s demolished until it reaches the landfill.
How do I estimate how much waste my renovation will produce?
Estimate your waste volume by calculating the cubic yardage of the materials you plan to remove. Use the rule of thumb that one cubic yard is roughly the size of a standard kitchen stove. For example, a full gut of a 100-square-foot bathroom typically fills a 10-yard dumpster. Always round up your estimate to avoid the cost of a second delivery. Proper estimation is the most effective way to keep your budget from spiraling out of control.
Can I put all types of renovation debris in the same dumpster?
You can mix standard materials like wood, drywall, and flooring in a "mixed debris" container. However, you should never mix heavy inert materials like concrete or brick with lighter trash. These heavy materials require a dedicated bin to prevent the truck from exceeding legal weight limits. Sorting these at the source keeps your disposal costs predictable and avoids overweight fees that can occur at the landfill.
Do I need a permit for a dumpster in New York or San Francisco?
Permits are required in New York and San Francisco if the dumpster is placed on a public street or sidewalk. You must apply for these through the local Department of Transportation or Public Works office. If you place the container entirely on your private property, a permit is usually not necessary. Check your local municipal code 72 hours before delivery to ensure compliance and avoid unexpected fines from city inspectors.
What is the most efficient way to load a roll-off dumpster?
Load the dumpster by placing large, flat items like plywood or doors at the bottom first. This creates a solid foundation and prevents air pockets that waste valuable space. Walk heavy items through the swinging rear door instead of lifting them over the side. Break down bulky cabinets and crates to pack the container as tightly as possible. Efficient loading ensures you maximize the volume you paid for without overfilling the bin.
How much lead time is needed to rent a dumpster for a renovation?
Provide at least 48 to 72 hours of lead time to ensure your equipment arrives exactly when you need it. In busy metro areas, same-day service is rarely guaranteed due to high demand and traffic constraints. Scheduling your delivery early allows you to finalize your site map and protect your driveway before the truck arrives. This proactive approach prevents your crew from sitting idle while waiting for a place to put debris.
What happens if I overfill my dumpster during a renovation?
Overfilling a dumpster creates a safety hazard that prevents legal transport. If debris rises above the top rail, the driver will leave the container on your site. You'll have to remove the excess waste yourself and pay a dry-run fee for the failed pickup attempt. Always monitor your volume daily to keep the load level with the "water line." This discipline keeps your site safe and your removal costs predictable.
Are there items that are strictly prohibited from renovation dumpsters?
Strictly prohibited items include hazardous materials such as asbestos, lead-based paint, wet chemicals, and solvents. You also cannot dispose of tires, batteries, or appliances containing refrigerants in a standard container. These items require specialized handling at dedicated facilities. Separate these restricted materials immediately to prevent your entire load from being rejected at the transfer station. Identifying these items early is a core part of any professional renovation waste disposal plan.